Cost calculator pond renovation and pond repair - Calculate Now
All still waters silt up over time. In a small body of water such as a garden pond, this process becomes visible particularly quickly. The main reason for this is the formation of sludge from leaves that have blown in and algae that die back every year. Therefore, if a pond has not been maintained for a long period of time, it may need to be rehabilitated from the ground up. If the siltation and weediness of the pond is too severe and cleaning with a silt extractor is not sufficient, a pond renovation is close to a new construction.
Planning the renovation work
At the beginning of the remediation work is the removal of water with a pump. Before and in parallel with this step of the work, fish that are still in the pond should be transferred to a tank. When the water is pumped out of the pond, the mud is removed with a shovel. Since the liner needs to be renewed, special care is not needed when removing the sludge. The sludge can be added to the compost. To do this, it should be mixed in well or added gradually in small portions.
Renew pond liner
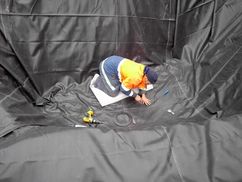
Now the old pond liner must be removed, which can be simplified if the liner is cut into pieces. Once the liner is removed, the bottom of the pond can be modeled according to your own ideas, for example, by creating different depth zones or a deep depression for water lilies. The edges of the pond should be level, which can be checked with a spirit level and a board. Before bringing in the new liner, its substructure must be prepared. If you would like to calculate the possible costs of buying a new pond liner, you can find our pond liner calculator here.
The pond bottom
First, the pond bottom is cleaned of visible stones, branches and root pieces. Then a layer of sand about ten centimeters thick is applied. The sand must not contain any sharp or pointed gravel. A fleece of felt or geotextile is placed on top of the sand to provide further protection for the liner. Now the liner is laid in the pond. It must be carefully spread out and pulled over the edges of the pond basin.
Instructions for repairing the pond
- First of all, you need to locate the damaged area. Once you have found it and determine that it can be repaired, proceed in much the same way as you would when patching a bicycle tire.
- Around the hole in the pond liner, use a coarse brush to remove algae and dirt.
- Then use sandpaper to roughen the surface.
- Cut a suitable patch from the edge of the PVC film.
- A suitable adhesive is applied both around the damaged area and on the dry pond bottom, after which the patch is glued on.
- How to apply the patch is best described in the instructions for use of the adhesive. For some, the adhesive surface must be dried, for others, the patch must be attached immediately after applying the adhesive. The patch must be applied tightly. A rolling pin does an excellent job of applying it.
- Once the liner is tight again, it usually takes a few more days until the final strength is reached.
Cleaning the garden pond
Once all the damaged areas have been repaired, the next step is to clean the pond. In the process, the substrate and any existing stones are freed from algae growth, dead parts are removed from the plants and the old water is partially replaced with fresh water. So that the pond remains clean, one can get the most different aids in the trade. What you need and whether it actually serves its purpose, it is best to try out yourself.
How to fill the pond with water
 Filling the pond can begin. However, the pond is not filled completely at first, but only in the lower third. Before the rest of the water is let in, the water plants are brought into the pond. The best way to do this is to place the plants in mesh baskets that have been lined with a small piece of fleece to prevent them from growing too much. To weigh them down, the baskets are covered with stones. Then the pond is filled completely.
Only then is the foil cut off at the edge of the pond, although not too much should be removed. The edges of the foil can be covered with gravel and stones to complete the restoration work. Any fish removed at the beginning of the work are reintroduced.
The best time for pond renovation is spring, when there are no more night frosts and the water temperature is above 10° Celsius. If no basic renovation of the p ond is required and the liner can remain in the pond, complete desludging and, if necessary, replacement of the vegetation is also sufficient. De-silting must be done carefully so as not to damage the pond liner. Minor damage can be repaired in the drained pond with special adhesives for pond liners.
Topics: building & Garden & Pond Technology


